Most experiments will include an apparatus list and diagram of the apparatus setup.
Apparatus List
If you are planning an experiment your apparatus list should include all apparatus needed to undertake the experiment.
You may be given a list of suggested apparatus as a guideline. You do not need to use all of the equipment suggested.
You may also choose to include other (common) apparatus that you know if available in the lab or you have access to at home (eg. tape, card, string, etc.)
Diagram
A sketch and labelled large diagram of the set-up will help you visualise the set-up and describe the procedure later. The first step in any practical procedure is usually:
“1. Set up the apparatus as shown in the diagram.”!
- Sketch – means use a ruler for straight lines, but doesn’t need to be drawn to scale
- Large – ⅓ to ½ page is typical (you can’t draw it too big!)
- Labelled – identify all the main parts of the apparatus and indicate and lengths or angles, to be measured.
- Don’t float the apparatus in air. A single line is enough to show the tabletop/floor that the apparatus is arranged on (not required for top view)
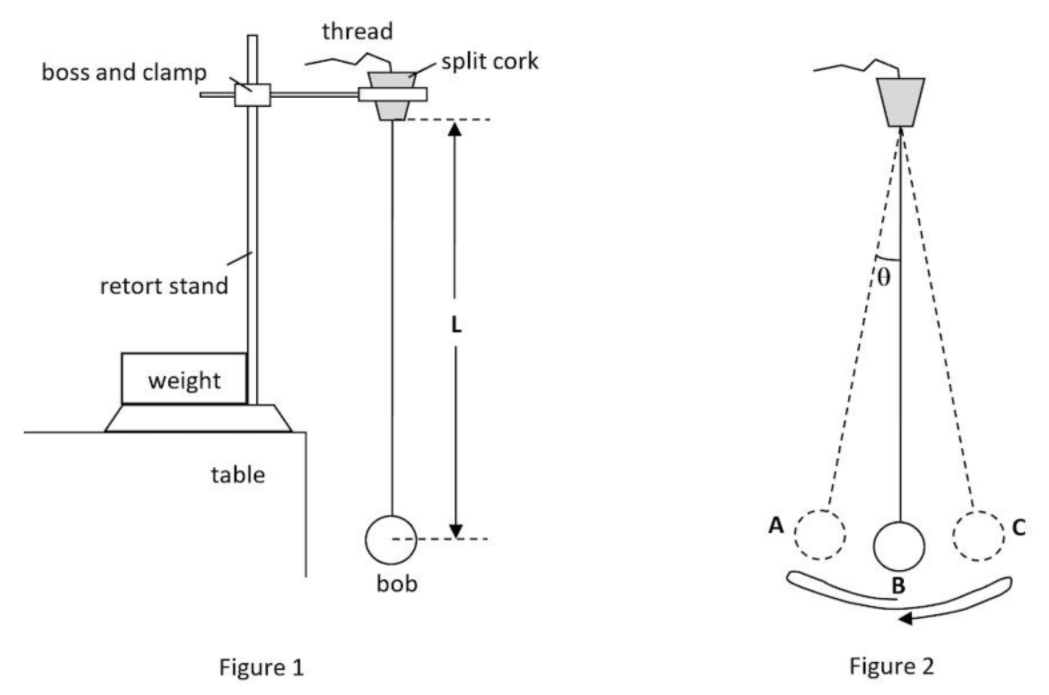
| Example 1 |
|---|
List of apparatus:
Diagram:
Note:
|
| Example 2 |
|---|
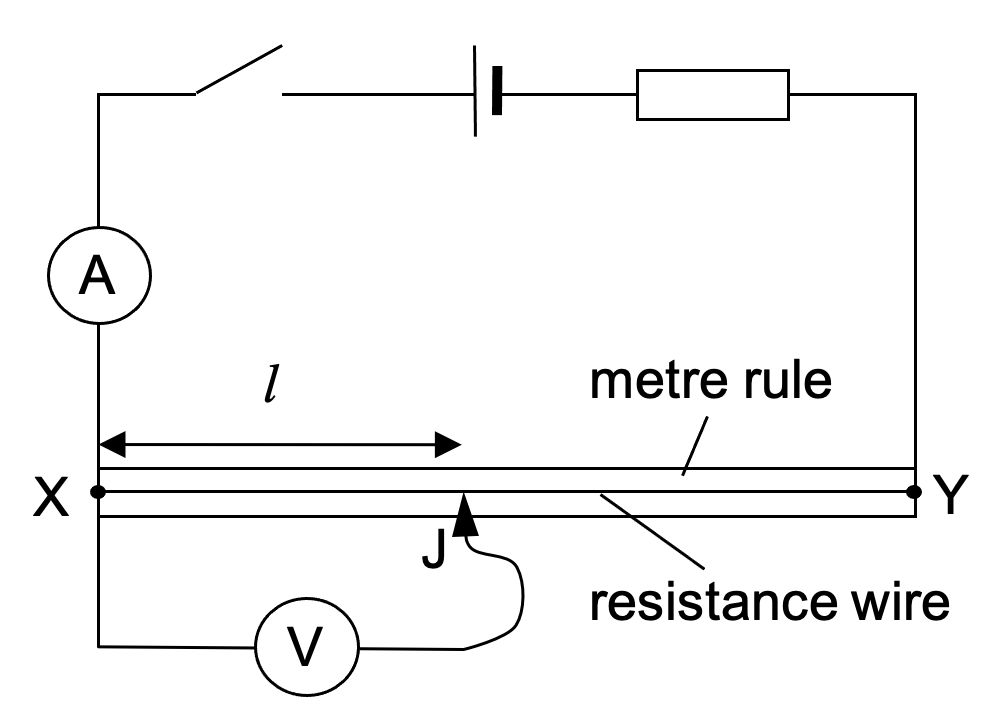
Note: For electric circuits we can use circuit symbols to show how the circuit can be set up. Here circuit symbols are used for battery, switch, resistor, etc, whilst the ruler and resistance wire are shown as ‘real’ objects. |
| Example 3 |
|---|
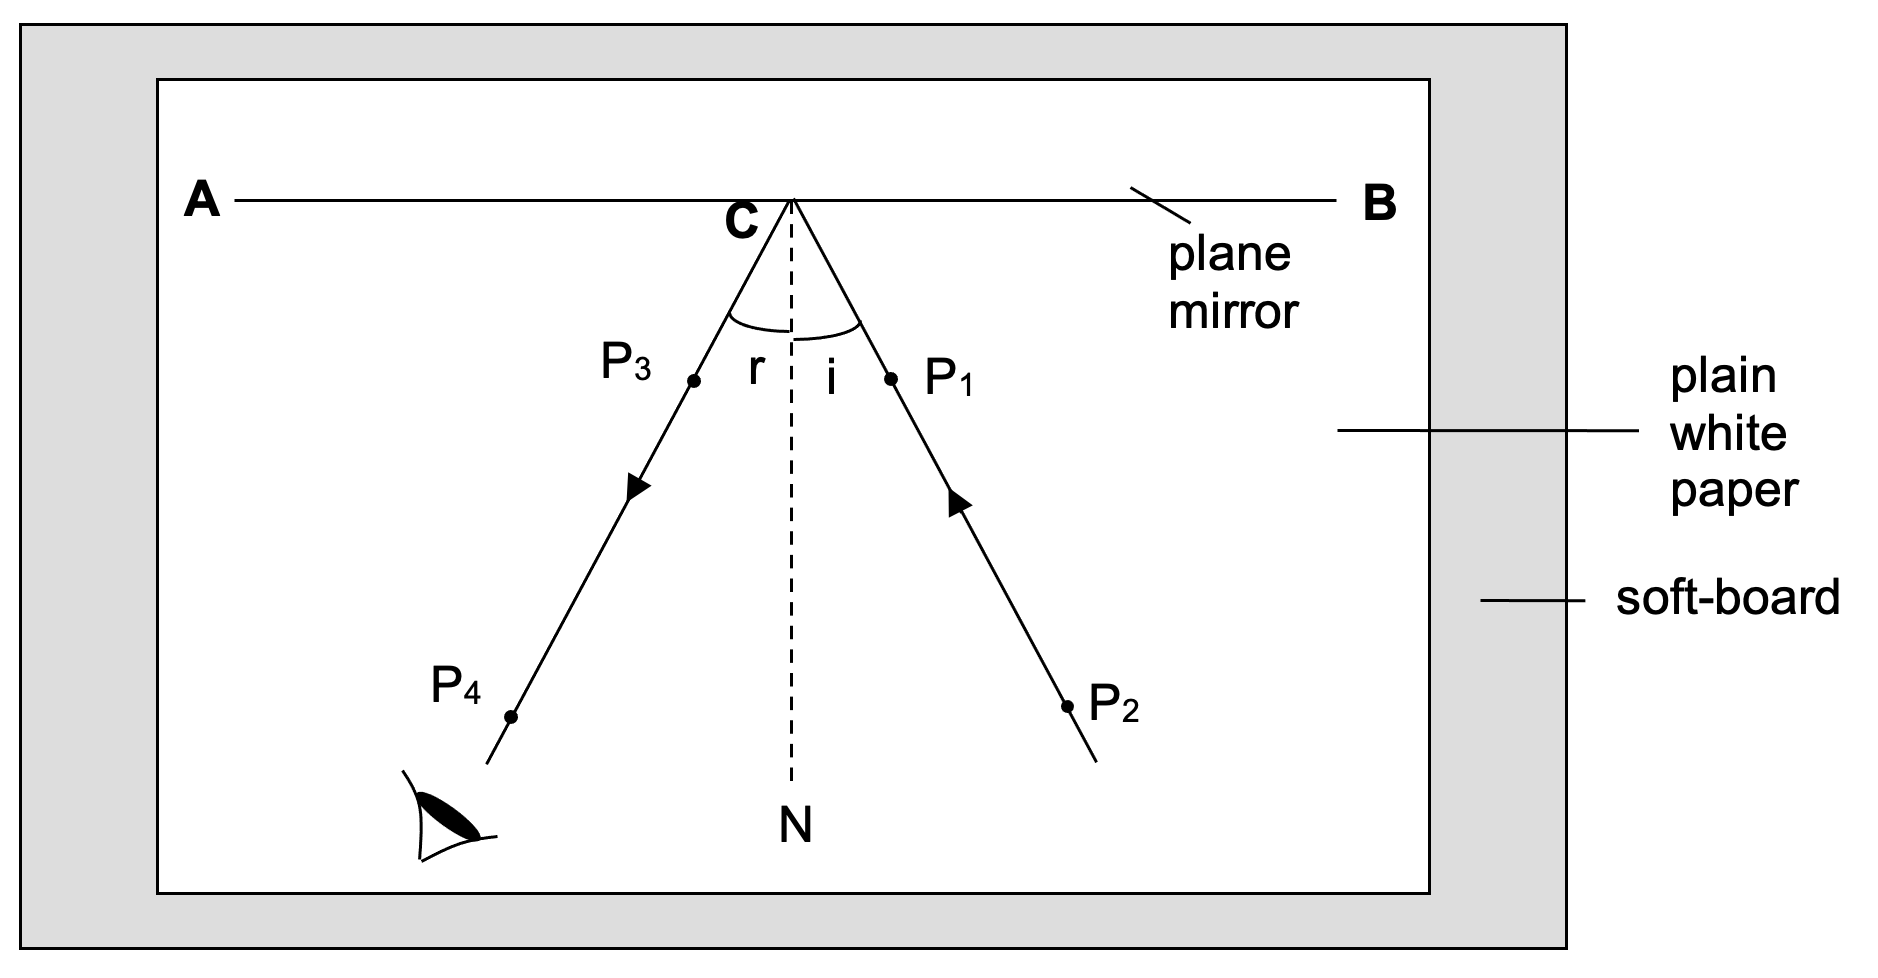 Note: Note:
The angles to be measured are clearly indicated on the diagram. |
| Example 4 |
|---|
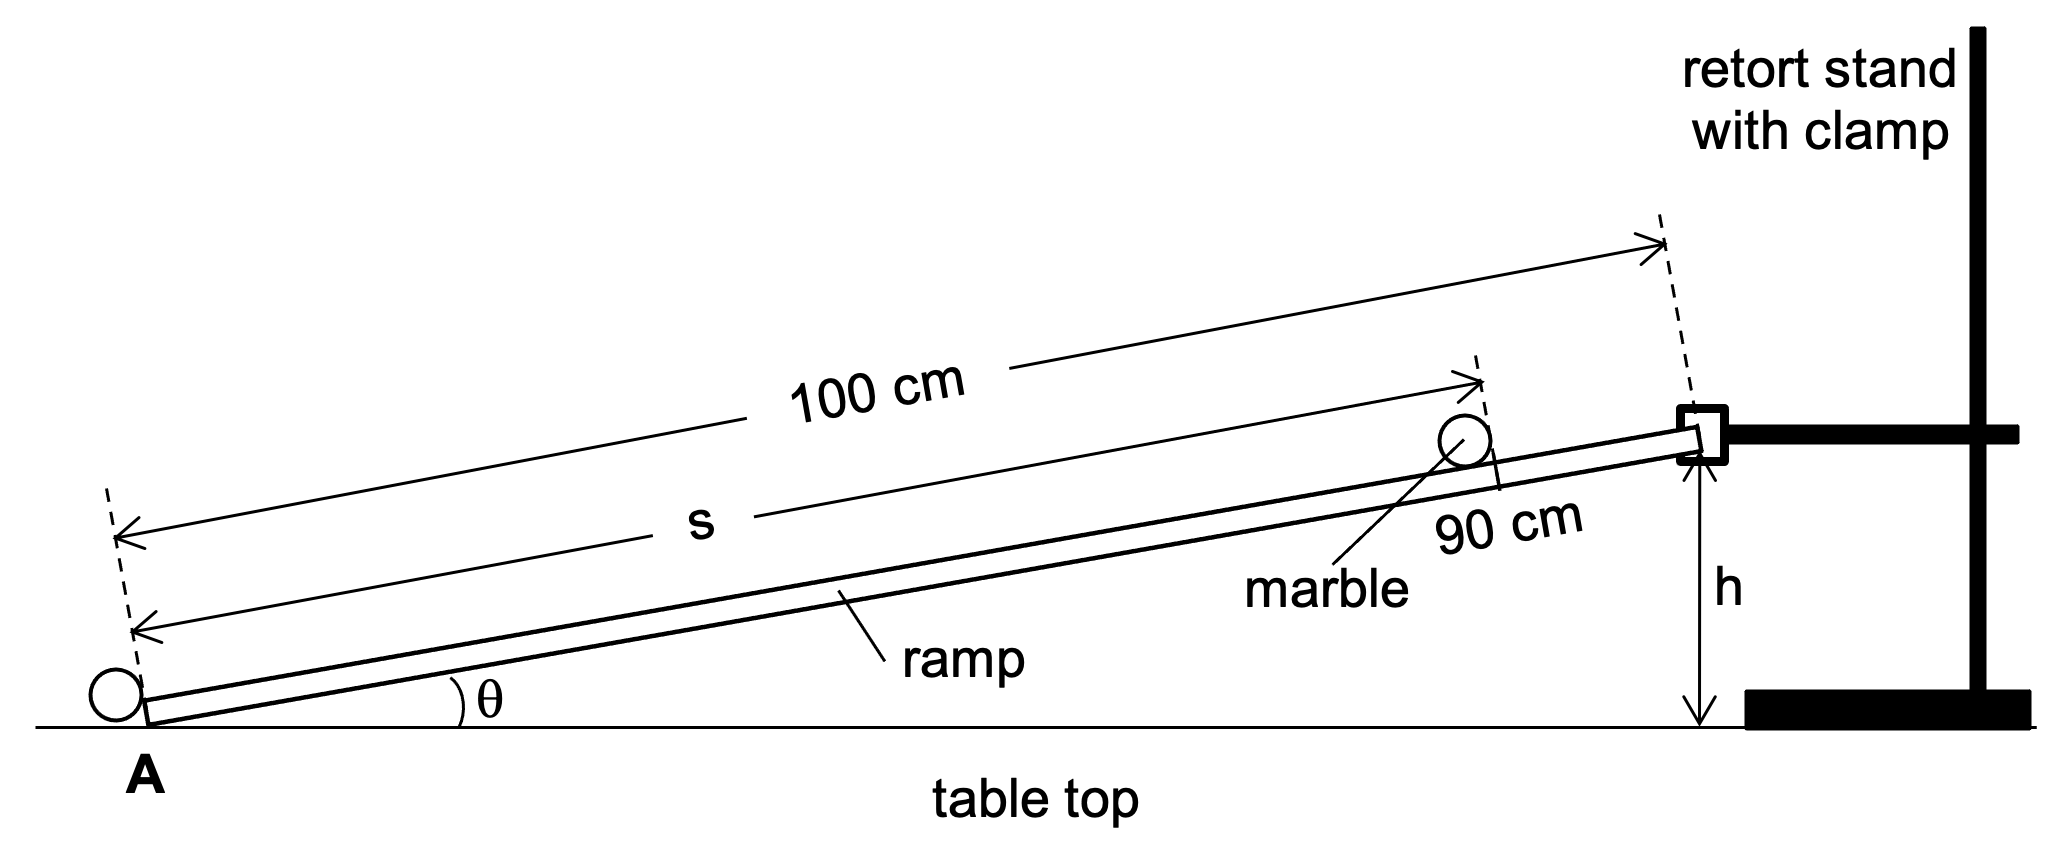 Note: Note:
The diagram not only shows the apparatus being used, but also clearly shows the variables s, θ and h. The start and end points of the marble on the ramp are also clearly indicated. |
| << Back | Basics | Next >> |